
Adding Google Maps
On this page:
Overview
It's possible to display Google maps on your directory. This is often used by churches or diocese with multiple congregations who meet in different locations to show the locations of all the congregations or other useful locations. To enable this, you need to first set up an account with Google and enable billing on it. Then you need to enable two APIs to enable the maps to work. Finally you need to create two API keys for these and to paste those into the admin area of your website. It's important to complete all the steps below in order for your maps to work.
Setting up your Google Cloud Console Maps account with Google
Google require each customer using this service to have an account with them with billing set up. They currently include $200 credit each month which means in practice that most churches won't end up being charged anything. For example, 100,000 loads of a static map costs $2. More information on their pricing for this service can be seen here
1. Go to https://cloud.google.com/maps-platform/ and log into your Google account click 'Get Started'
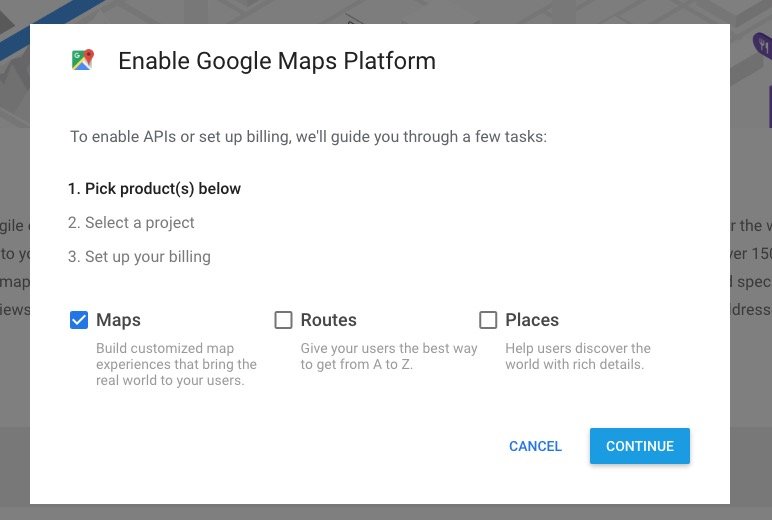
2. This brings up the dialog box below where you need to click ‘Maps’ and then ‘Continue’.
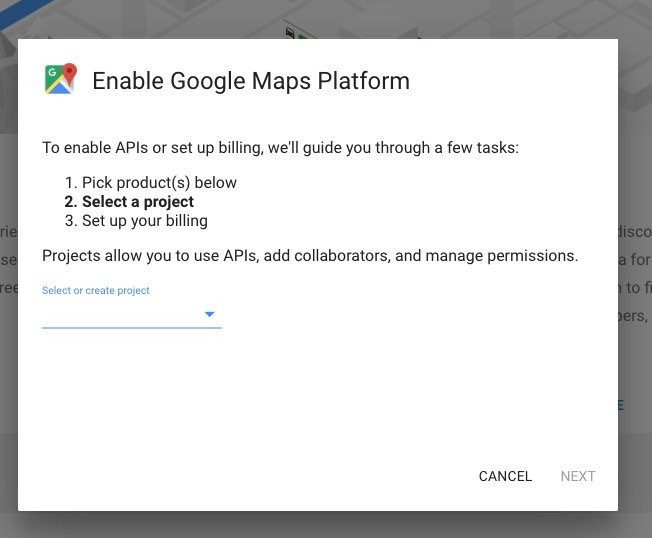
3. Create a project on the platform. Most of our clients call their project the name of their business or church.
4. Set up your billing - again Google will take you through the steps necessary to do this.
Enabling your APIs
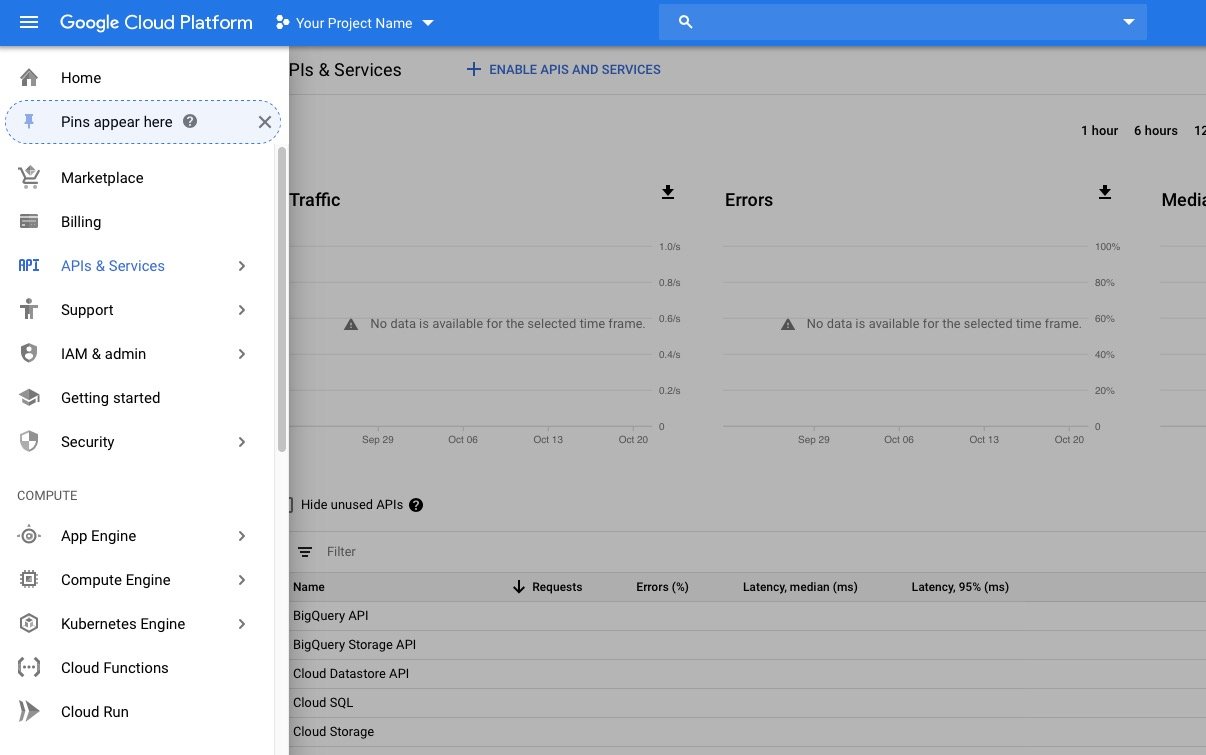
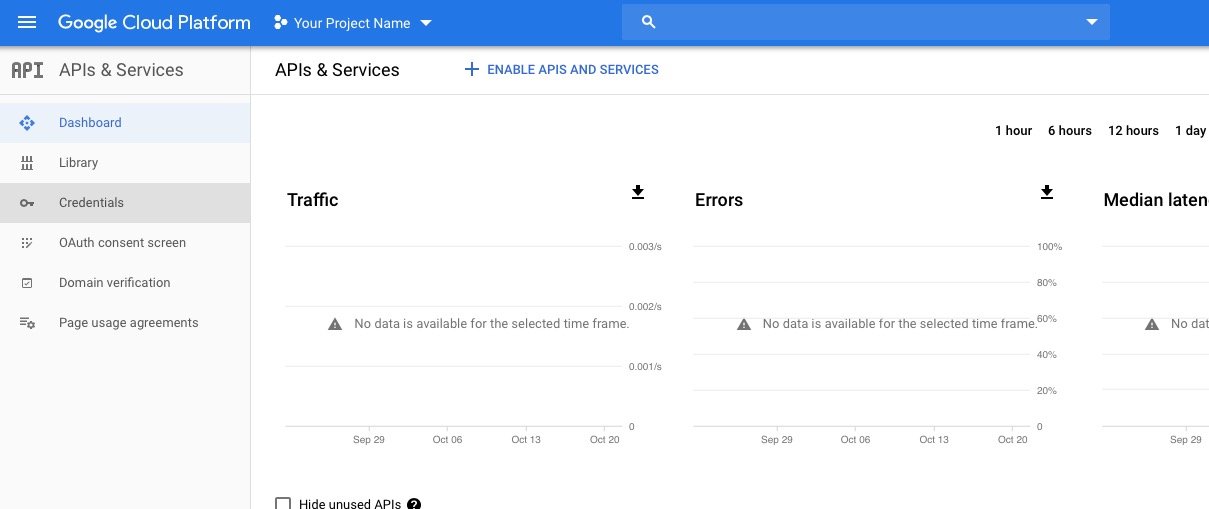
1. Go to the Google Cloud Platform Console and go to Maps APIs and services: https://console.cloud.google.com/google/maps-apis/ . The navigation to go between sections in the Console can be done using the three white bars of the hamburger menu on the top left which brings up the following navigation. Choose 'APIs & Services'
2. Click '+ Enable APIs and Services'
3. This takes you to the API Library.
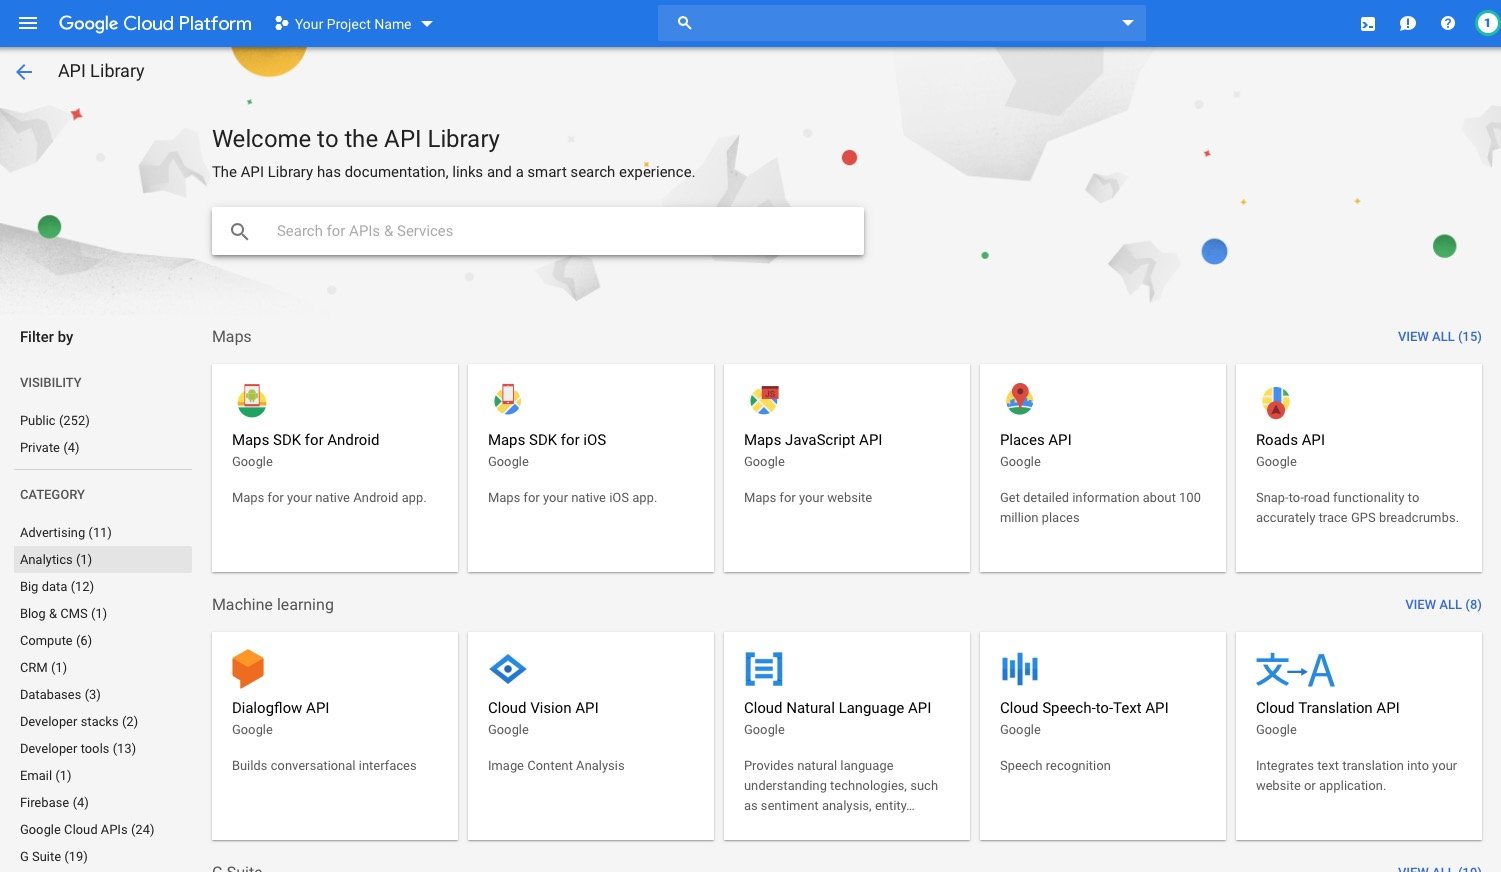
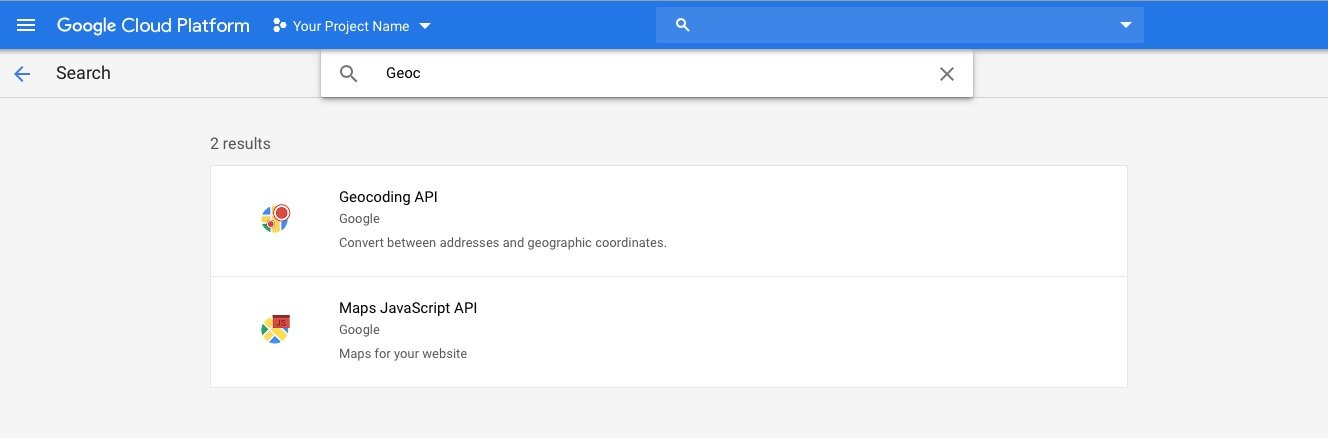
4. You need to enable just two APIs which are Maps Javascript API and Geocoding API. If you start typing 'Geoc' into the search field, you will see the two APIs come up which you need to enable.
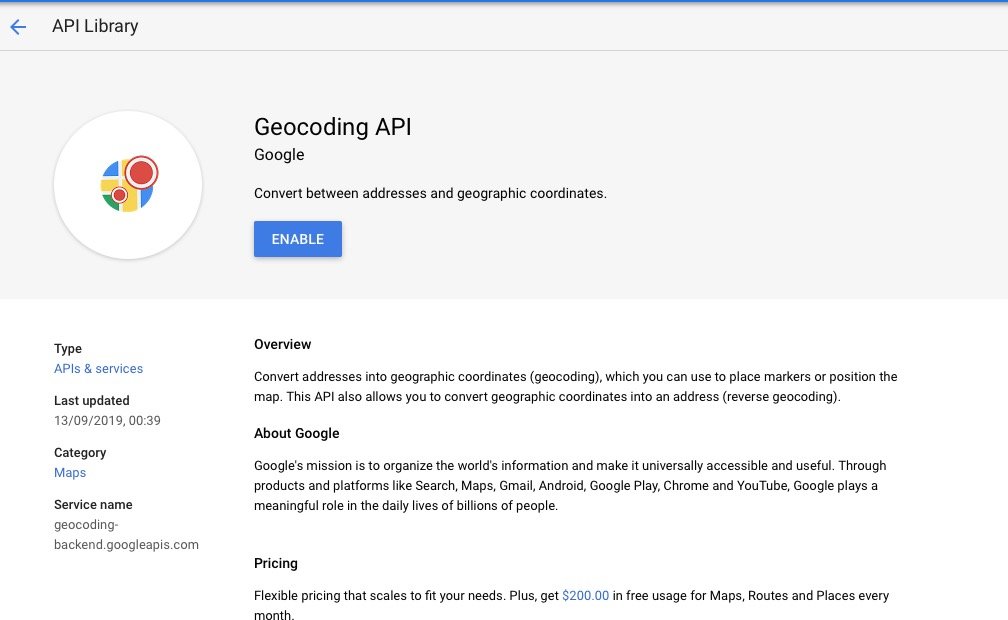
5. To enable them simply click on the search result such as 'Geocoding API' which brings up the screen below and click the blue 'Enable' button
6. Once you've enabled this, you will notice it takes you straight to the screen for that API so you now need to go back to the API library to enable the other API. If you repeat steps 2-4 for the other API so you have both the Maps Javascript API and the Geocoding API enabled. You can also use the vertical navigation on the left hand side and click on 'Library' to access the API library.
Creating and restricting your API keys
We will be creating two API keys so that the APIs can be used both by your website in the browser and by our server so you can add in locations etc using your admin area. The map will not work without both API keys being created unless you have a completely unrestricted API key which isn't recommended since you have billing attached to the key and will want to make sure that only your website can use your APIs. To set them up, just following the next x steps.
1. Go to 'APIs & Services' again using the hamburger 3 lines menu on the top left.
1.
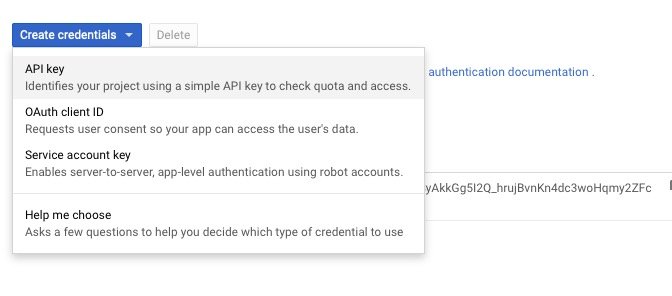
2. Click on 'Credentials' in the left hand vertical navigation and then click the blue button 'Create Credentials'.
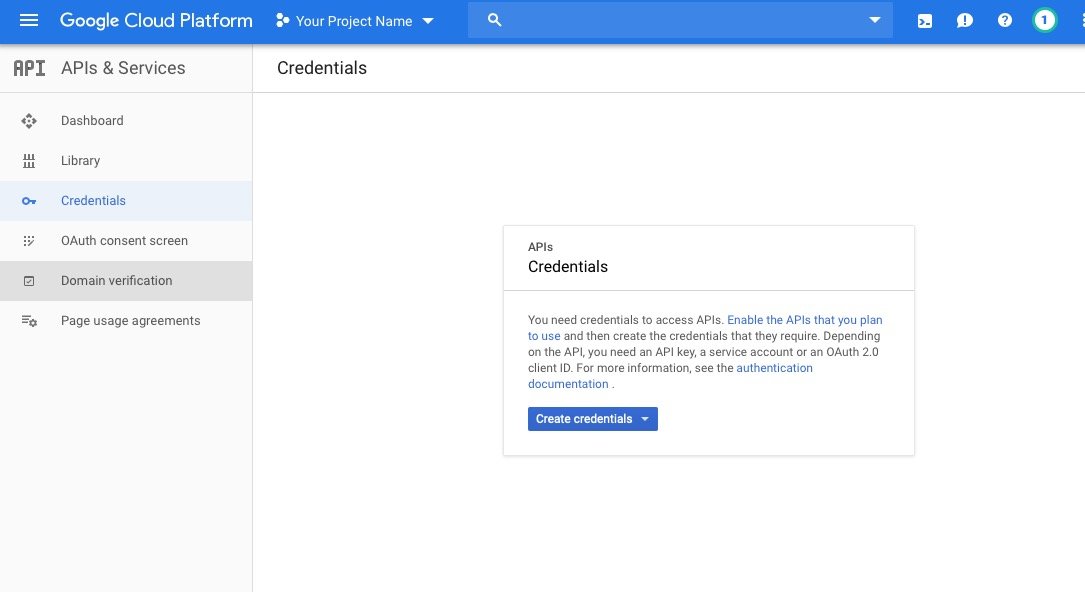
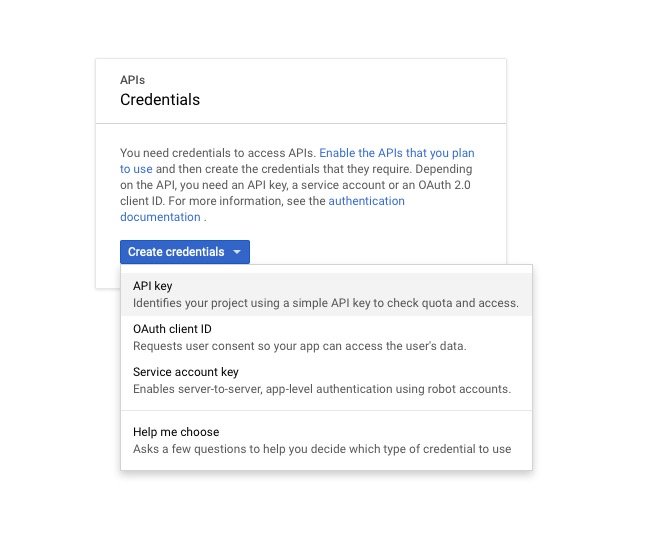
3. Choose 'API Key' from the drop down options
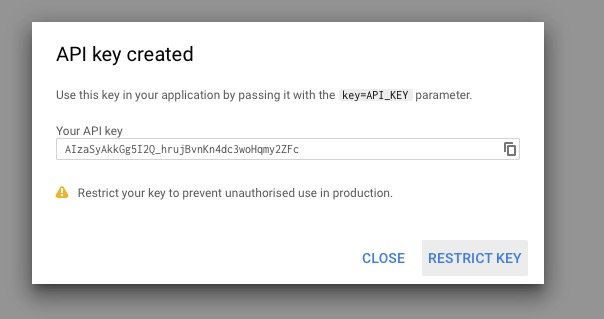
4. Click 'Restrict Key' on the resulting dialog box.
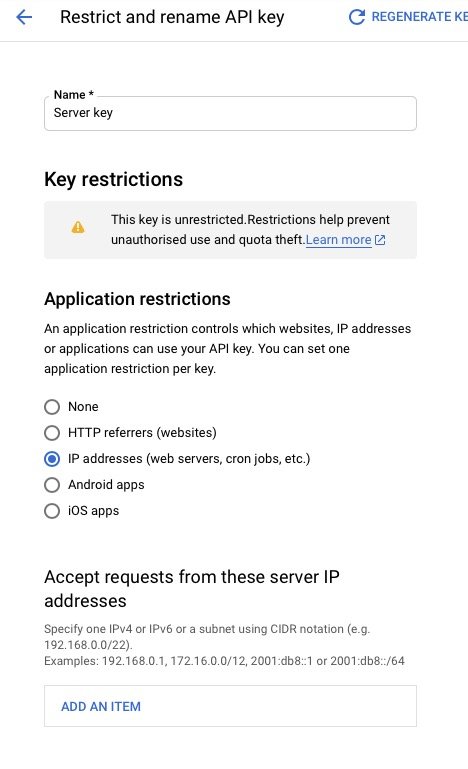
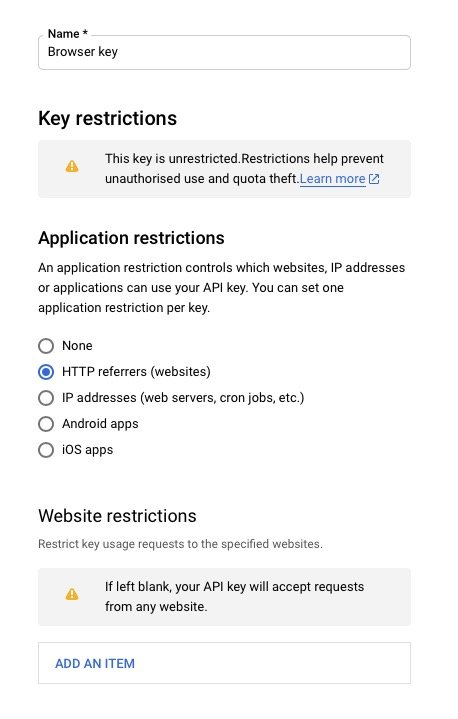
5. This brings up the following screen to both rename the API key and to restrict the key.
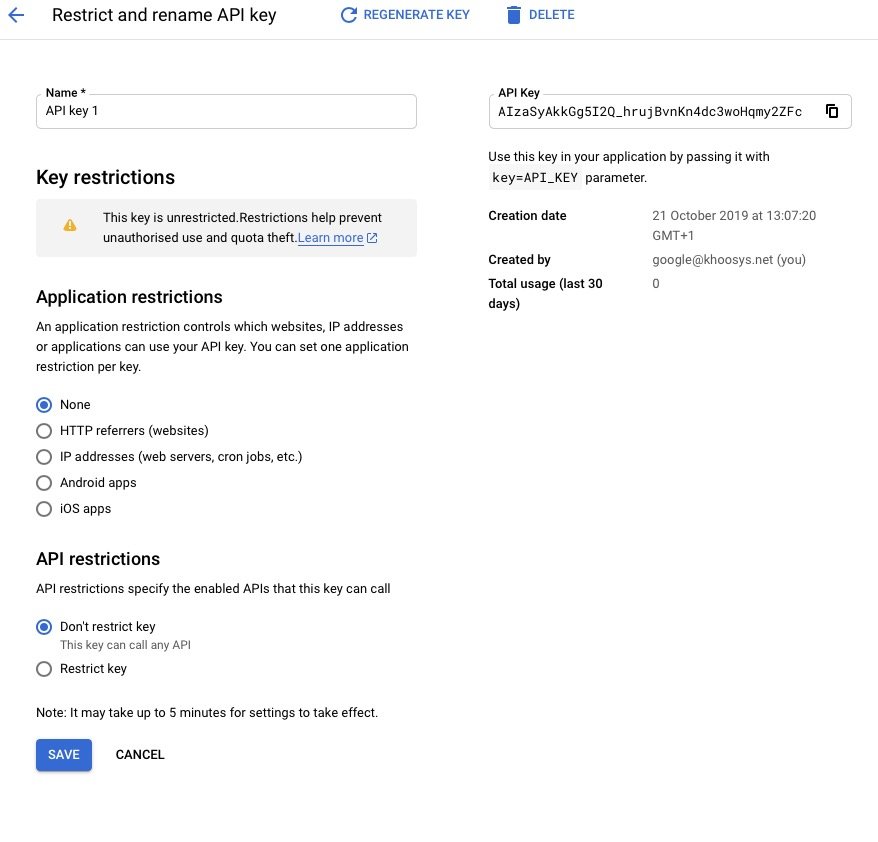
6. Change the name to 'Server key' and click the radio 'IP addresses (web servers, cron jobs, etc)' and then click 'Add an Item'
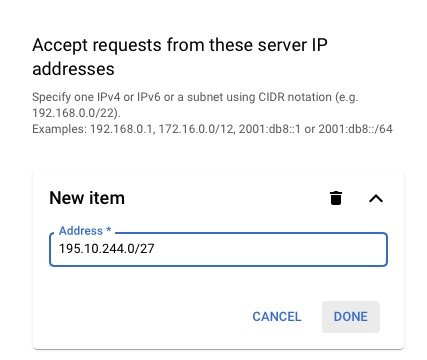
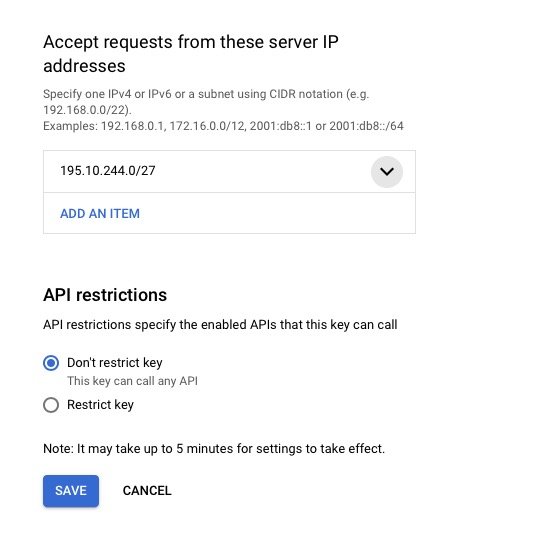
7. Type in the following IP address into the address field: 195.10.244.0/27 and then click 'Done'
8. Scroll down to the bottom and click 'Save'
9. Now we need to create the next key for the browser to use your API. You should now be on the following screen. If you're not, go to the 'Credentials' screen using the vertical nav on the left within 'APIs & Services' Once you are in this screen, click the blue button 'Create credentials'
10. Again choose 'API key' from the drop down selection
11. And again choose to 'Restrict Key' on the resulting dialog box.
12. This time you need to name the key 'Browser key' and 'HTTP referrers (websites)' under Application restrictions. And click 'Add An Item'
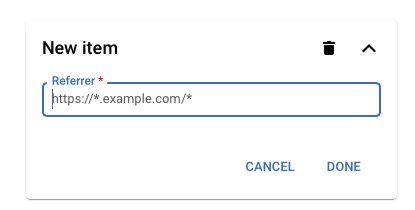
13. You will see an example within the input field of https://*.example.com/* - you will need to replace example.com with your own domain but include the asterix before the first full stop, the full stop before the domain and the forward slash and asterix at the end. For our own website, it would be https://*.churchpages.co.uk/* . When you have filled this field in, you can click 'Done'
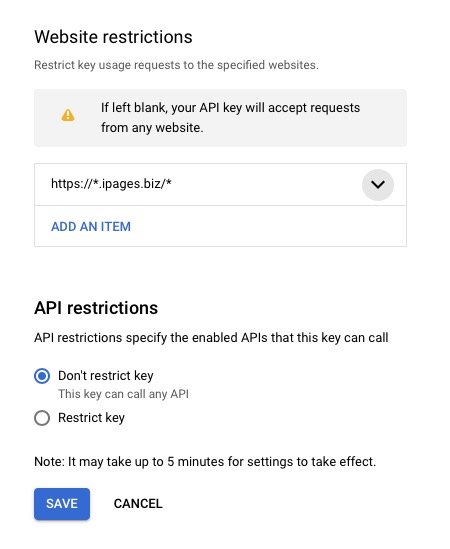
14. Next click 'Add An Item' to add another. This time you will need to add in the admin address of your website. This is individual to each Khooseller customer and you will receive this address from us directly to put in. When you've added this in, you can click 'Done'.
15. Again scroll down to the bottom of the page and click 'Save'.
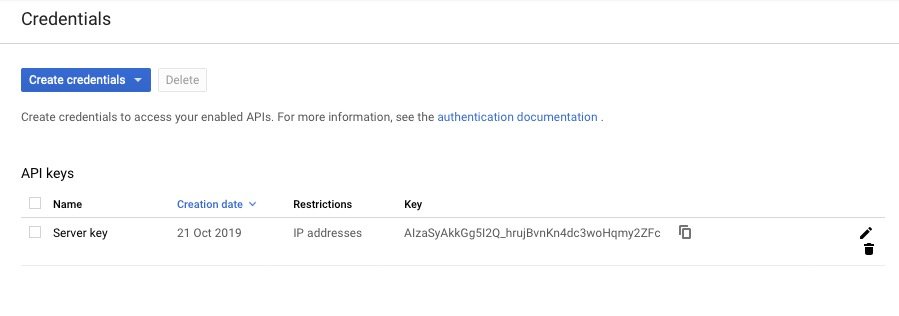
15. You will now see the following screen where you have two API keys called Browser key which restricts what website can use your API and one called Server key which restricts what server can use your API.
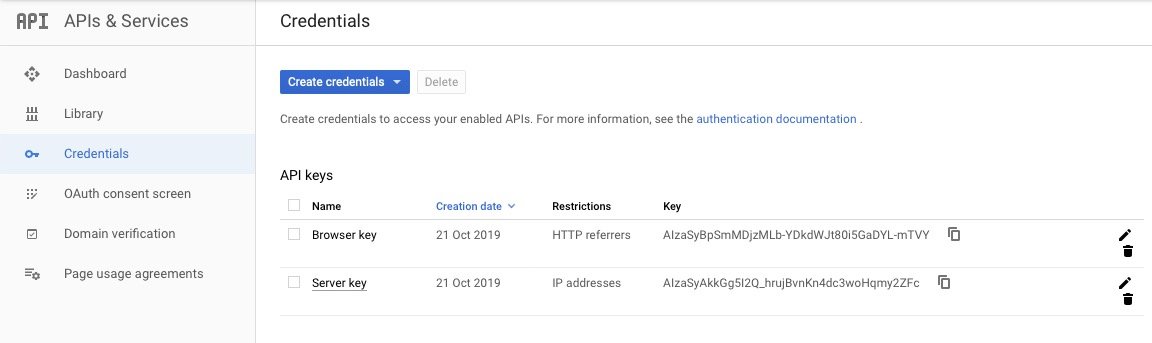
16. You will need to copy and paste both of these keys into your Google Maps integrations within your Khooseller admin area. There is an input field for both.
Setting up your Google Maps Integration
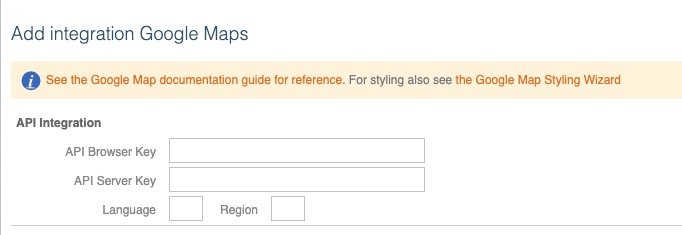
1. Go to 'Settings > Integrations > Google Maps'
Copy and paste the two API keys created in the previous steps into the relevant input fields. Clicking the little pages icon to the right of the Key within the Google Cloud Console Maps API area (can be seen in the screen grab from step 15 above) copies the key to your clipboard ready for pasting.
2. Click 'Save Changes' in the Google maps integration' and you're all set up ready to use the maps.